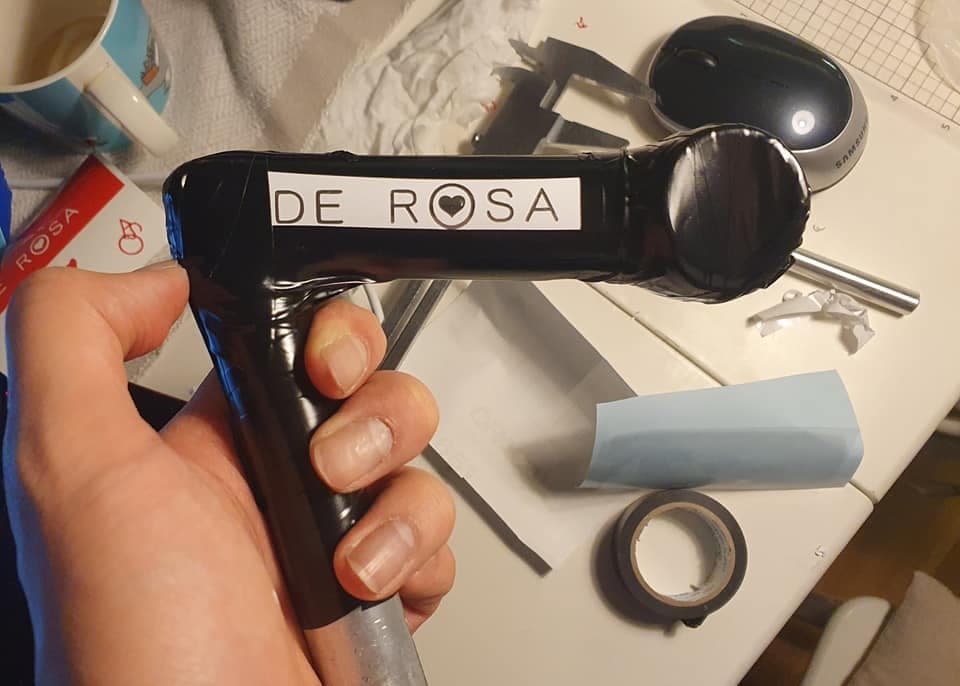
In order to have a clean result, the original anodizing should be taken off.
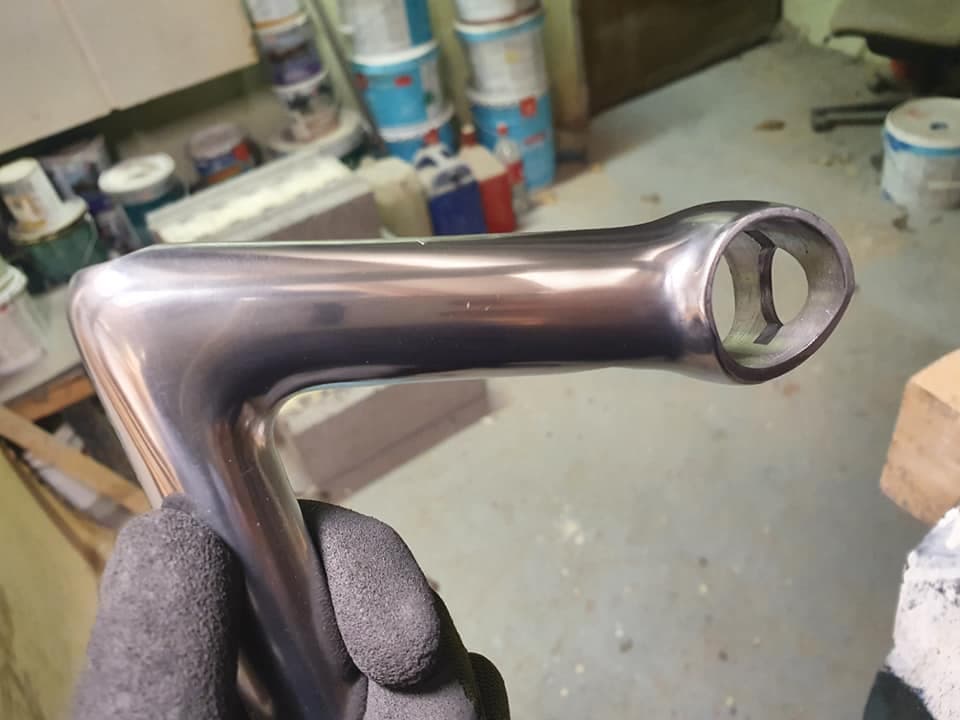
Thankfully the cosmetic condition was not so good. good chance to give a clean surface.
I simply used sandpapers
This is probably the most important step to have secure the result.
If the masking is not properly cover all the rest of the surface, you will have unwanted deep engraving following the leaked saltwater.
I simply used the normal electric black tape that you could buy it from Clasu or k-rauta.
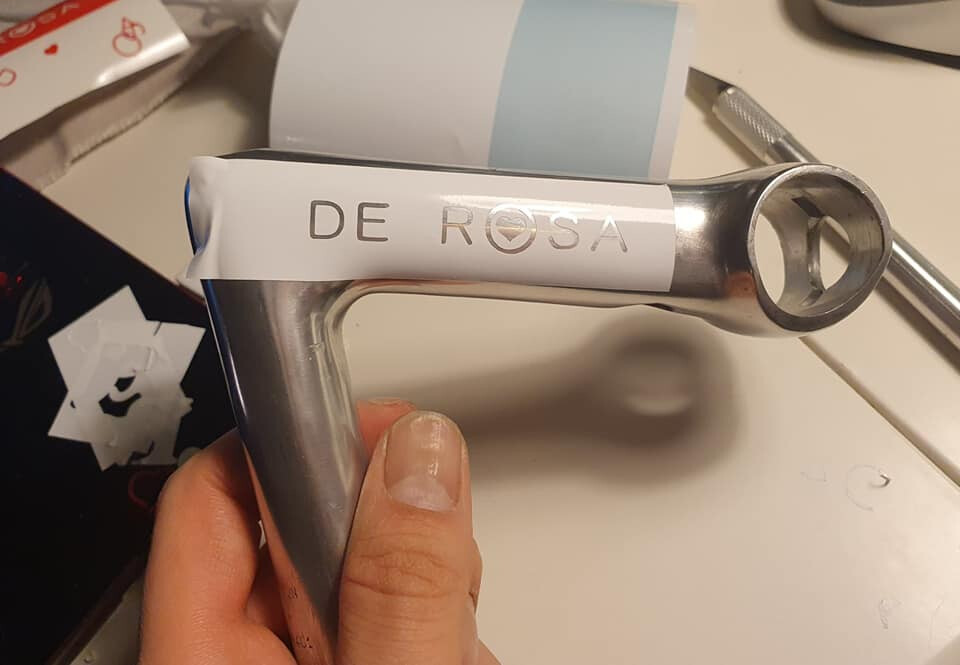
and the main material of sticker is vinyl permanent sticker sheet that you would be able to find from internet. I used the Oracle 651 vinyl sticker sheet.
Yes. the plus point of the vinyl sticker is that it will attach the surface very firmly but when it needs to be removed, It would be off easily.
I mostly use my fingernail to take it off.
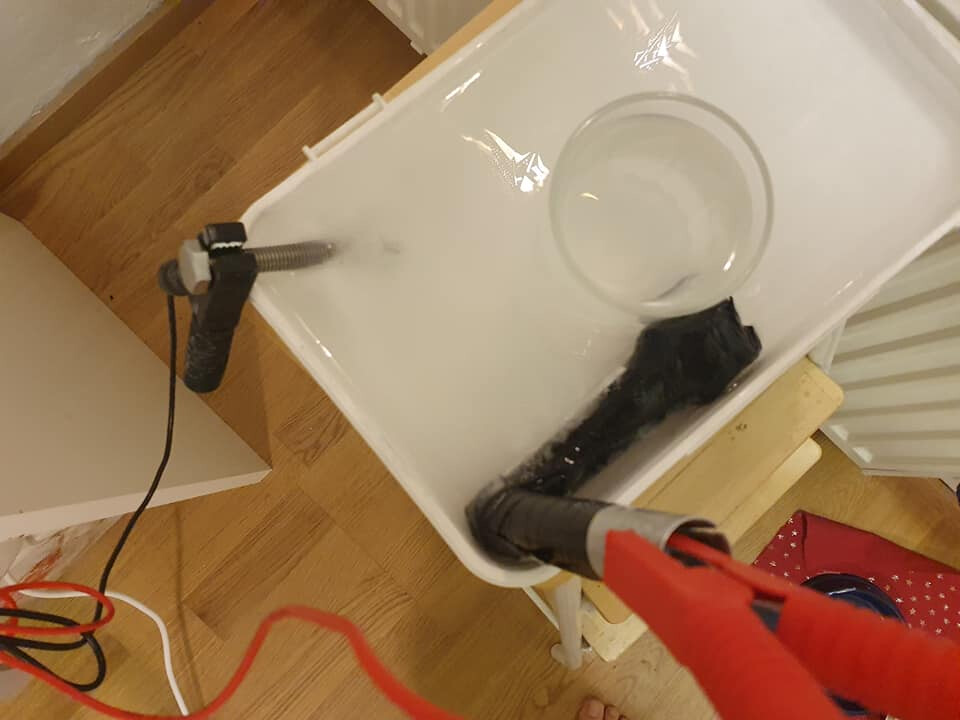
using the car battery charger sounds like a pretty decent way of getting a steady power supply, come to think of it, why not use one for anodizing also
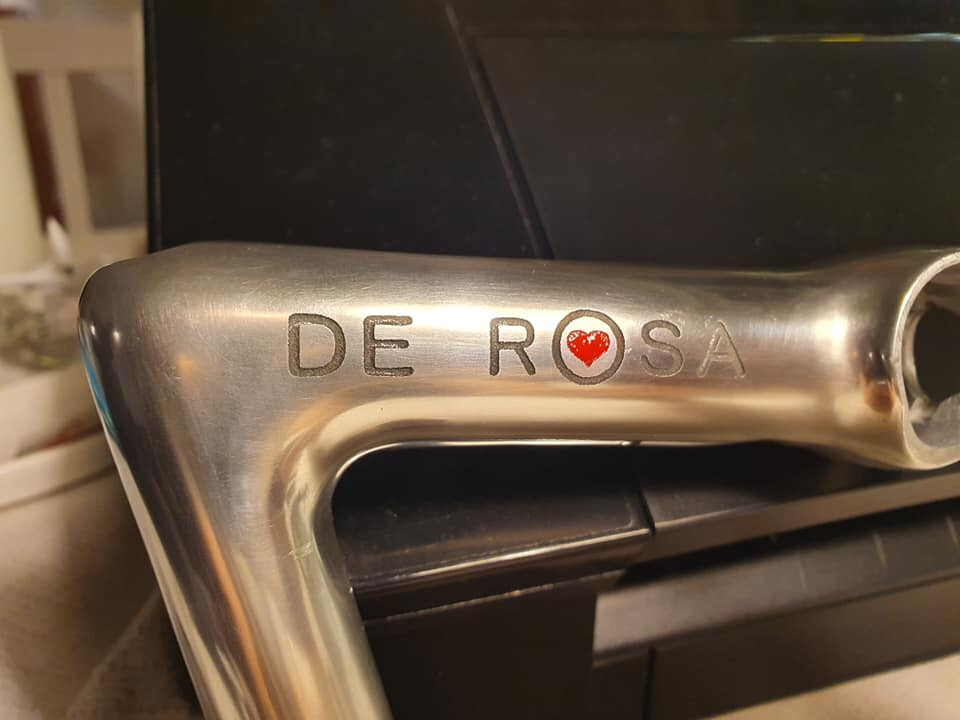
Very nice work minjoo. I can see that the etching bites quite aggressively in the aluminium as the edges and the base of the etch are a bit coarse.
Have you done this kind of etching before also? I’m just curious if there are ways to adjust the etching process or is it just a characteristic of the metal?
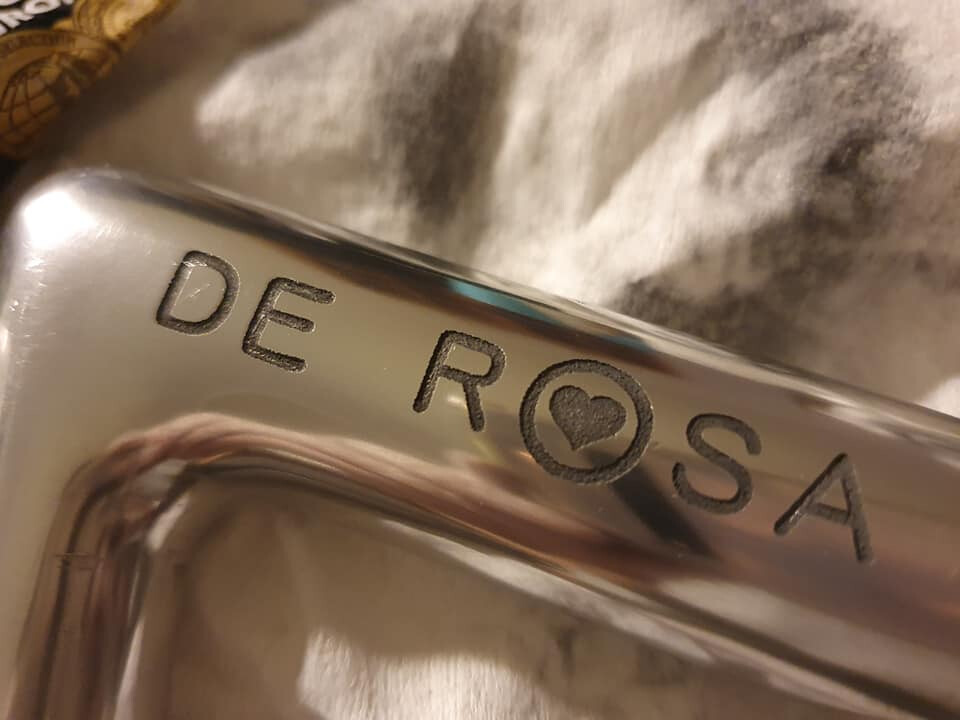
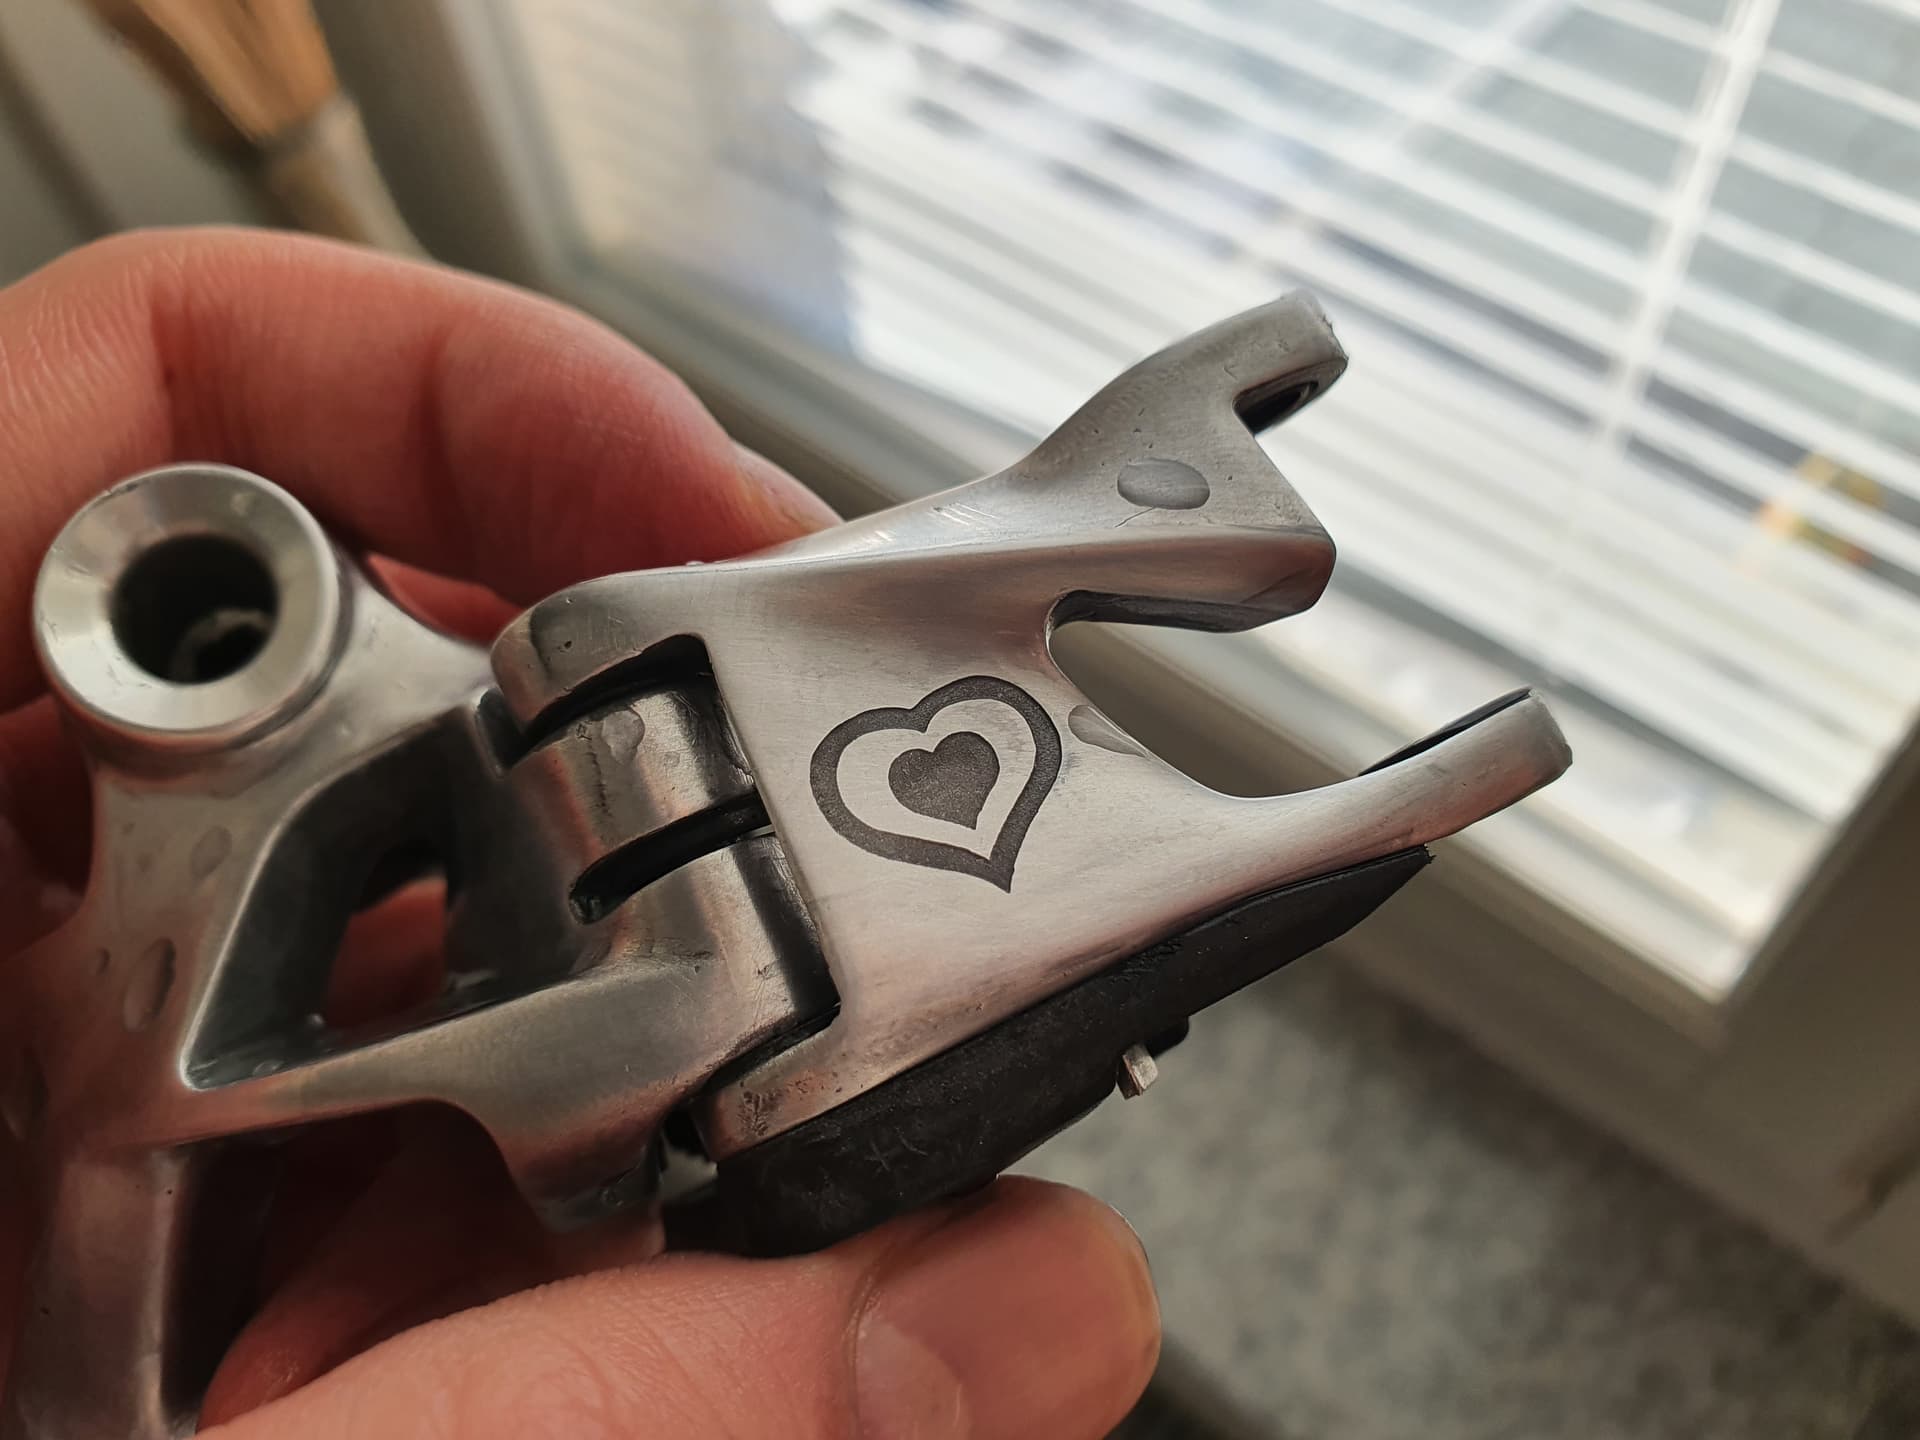
These are my recent experiments.
As you see etching for small size logos doesn’t have a coarse edge.
It was because, the processing time was only 5mins.
I believe the coarse edge is a characteristic result of the salt water etching on aluminum surfaces for over a certain size.
However, I do believe that the coarse edge could be able to adjust a bit smoother with sandpapering after the process.
And What I noticed through this work is that the pre-polishing does not necessary that much.
With mirror kinda surface rather slow down the process and that may cause more coarse edge results.
Therefore, I would take off the metal poliser apply before etching process for my next works.