Moi!
Some of you might remember the DIY stem and Crank engraving with the Electro etching method.
I always think that the highlight of pantographs back in the day was the engraving on the chainring.
Of course, the material of modern chainring is aluminum alloy and this surely has a possibility to apply the same procedure as stem or crank.
However, due to the shape of the object, some chainrings might not allow to have it as the space underneath of teeth is quite narrow that bother to do the properly completed masking for the rest of the spaces that you never want to leave a deep mark due to the etching liquid contact.
Thankfully the TA horus 11speed chainrings that are compatible with Campy bcd135 crankarms have enough space even though it is a 50T size chainring.

Only issue is that it’s anodized black but that can be easily removable with sodium hydroxide.

After that, I printed out the stencil vinyl sticker and applied it.
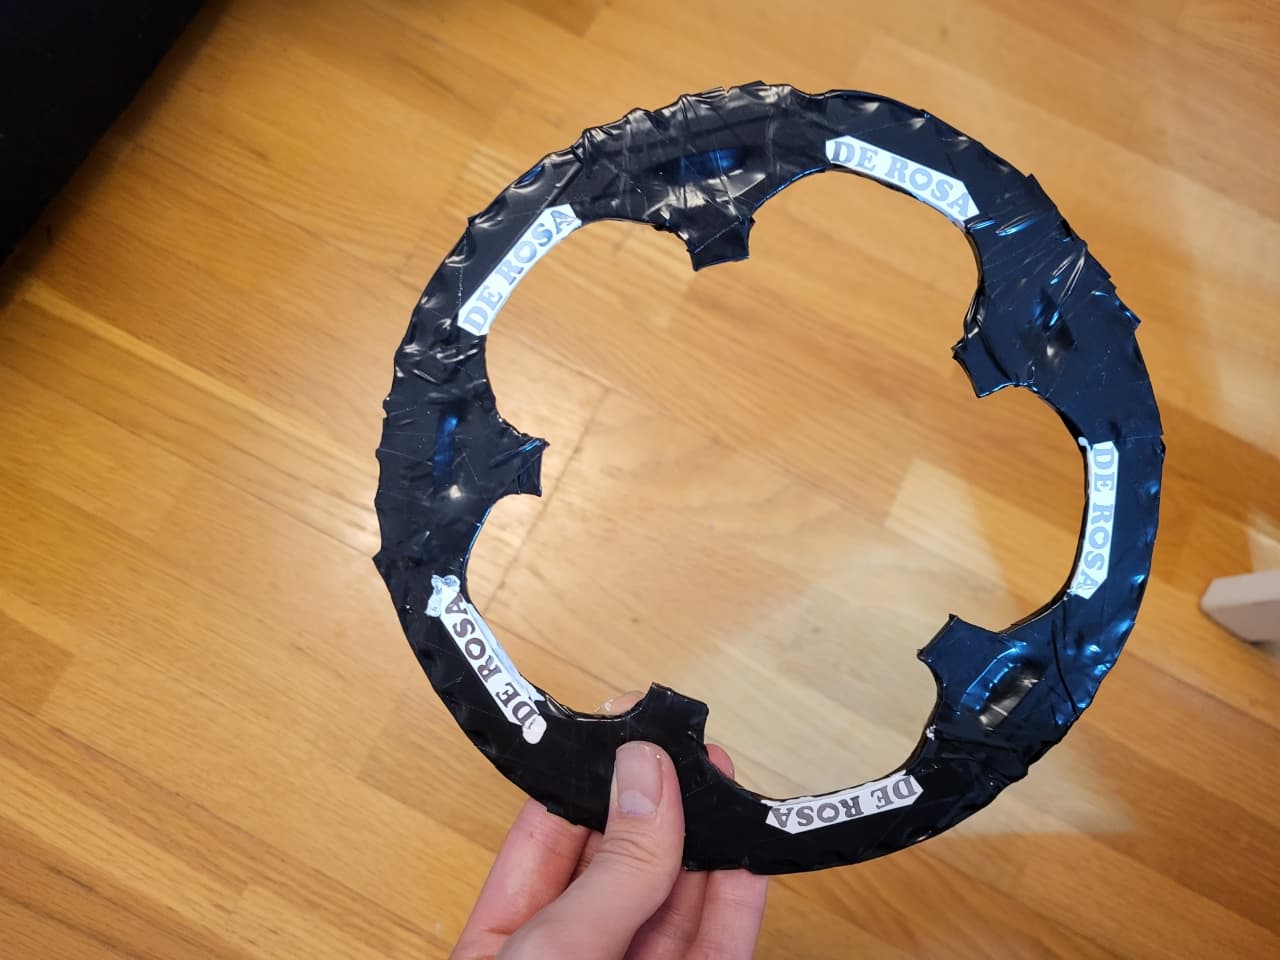
Also, the most important process, masking perfectly.
As I mention above, If the masking poorly done, the saltwater would go into the space where you do not want to leave the engrave.
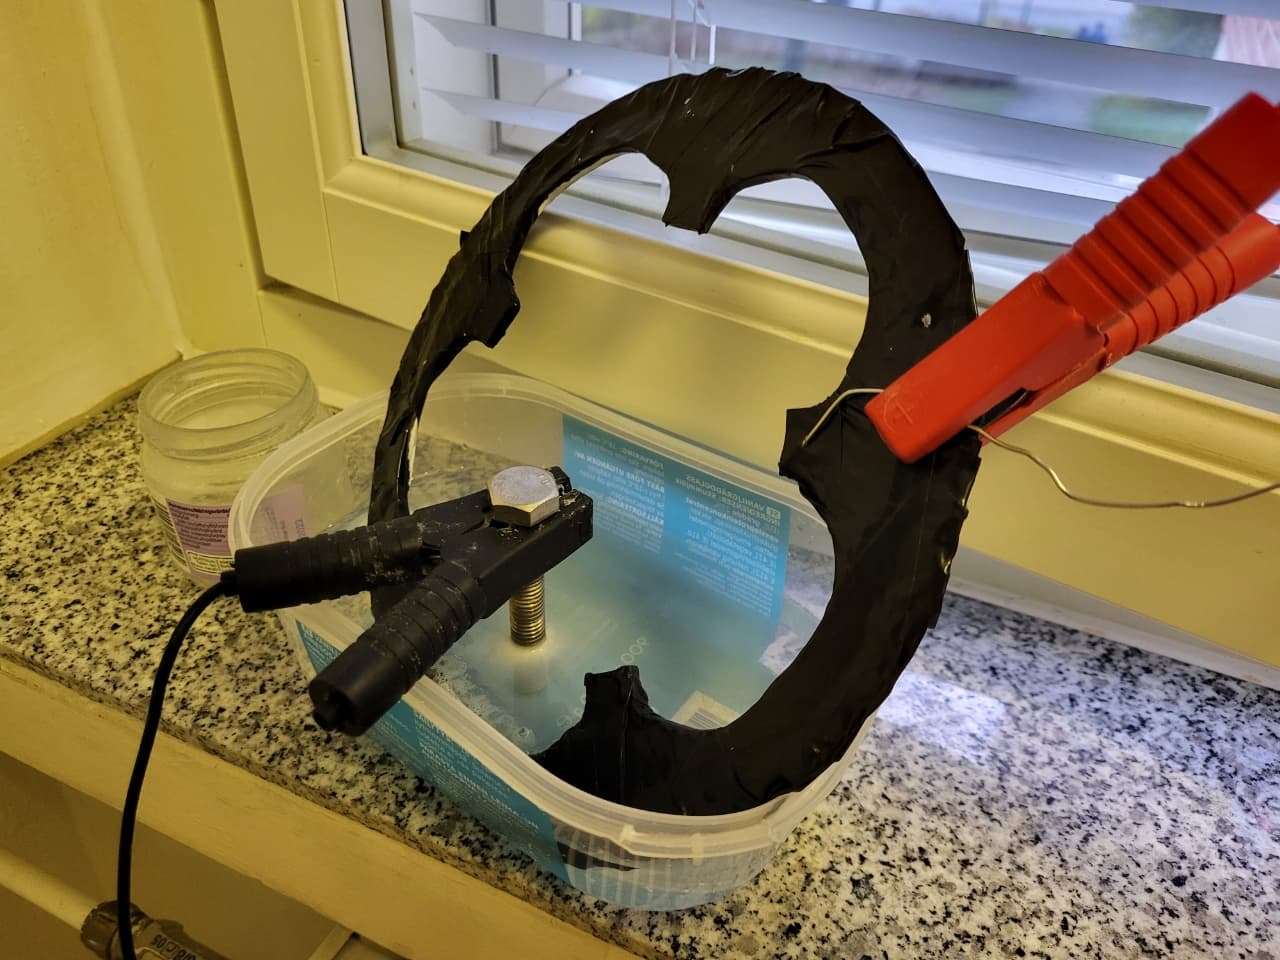
With the 6V car battery chager, each side of chainring get 16mins of electro etching process.
After about 1h and half an hour more…
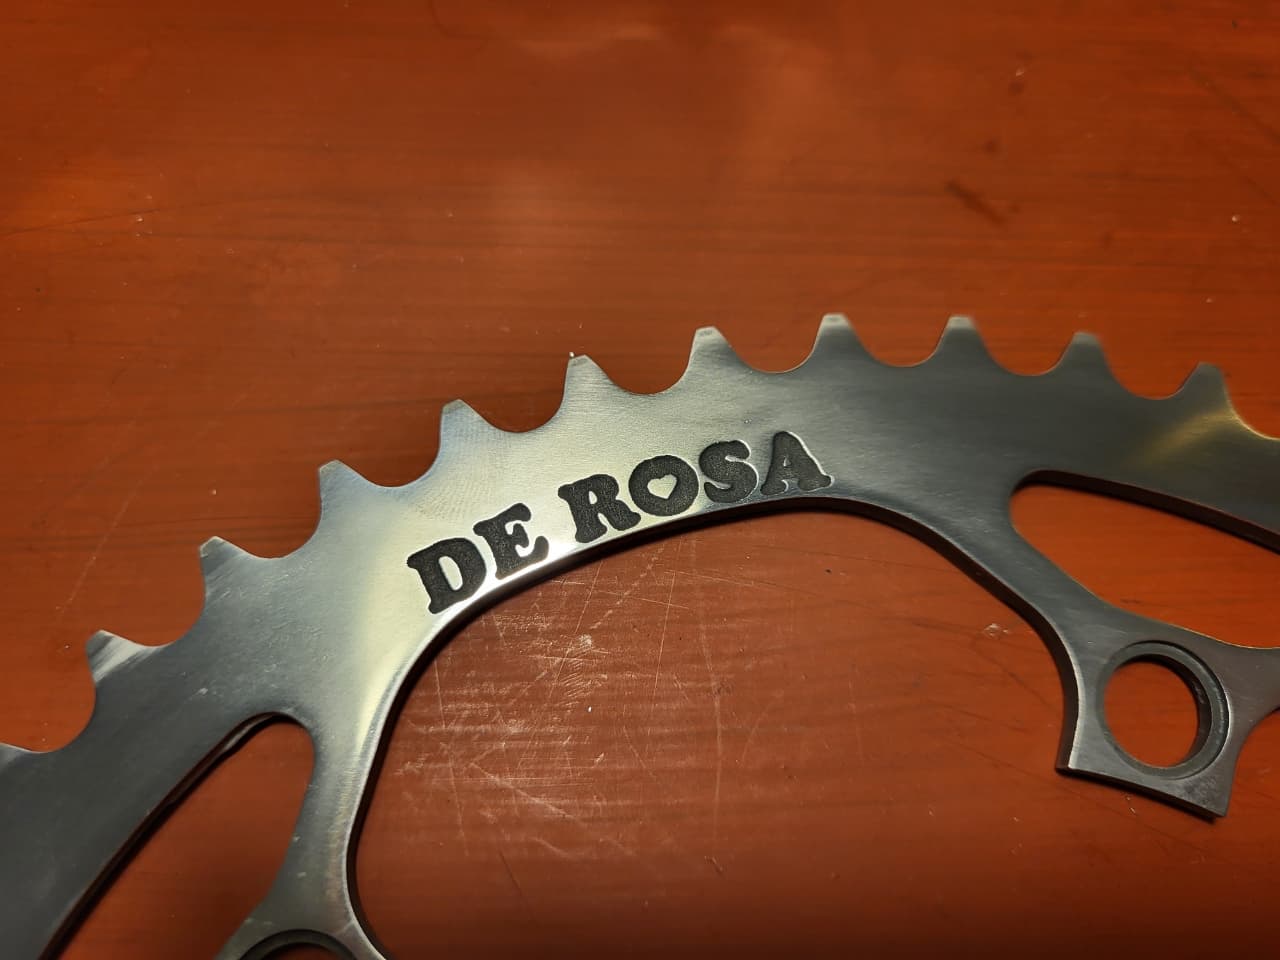
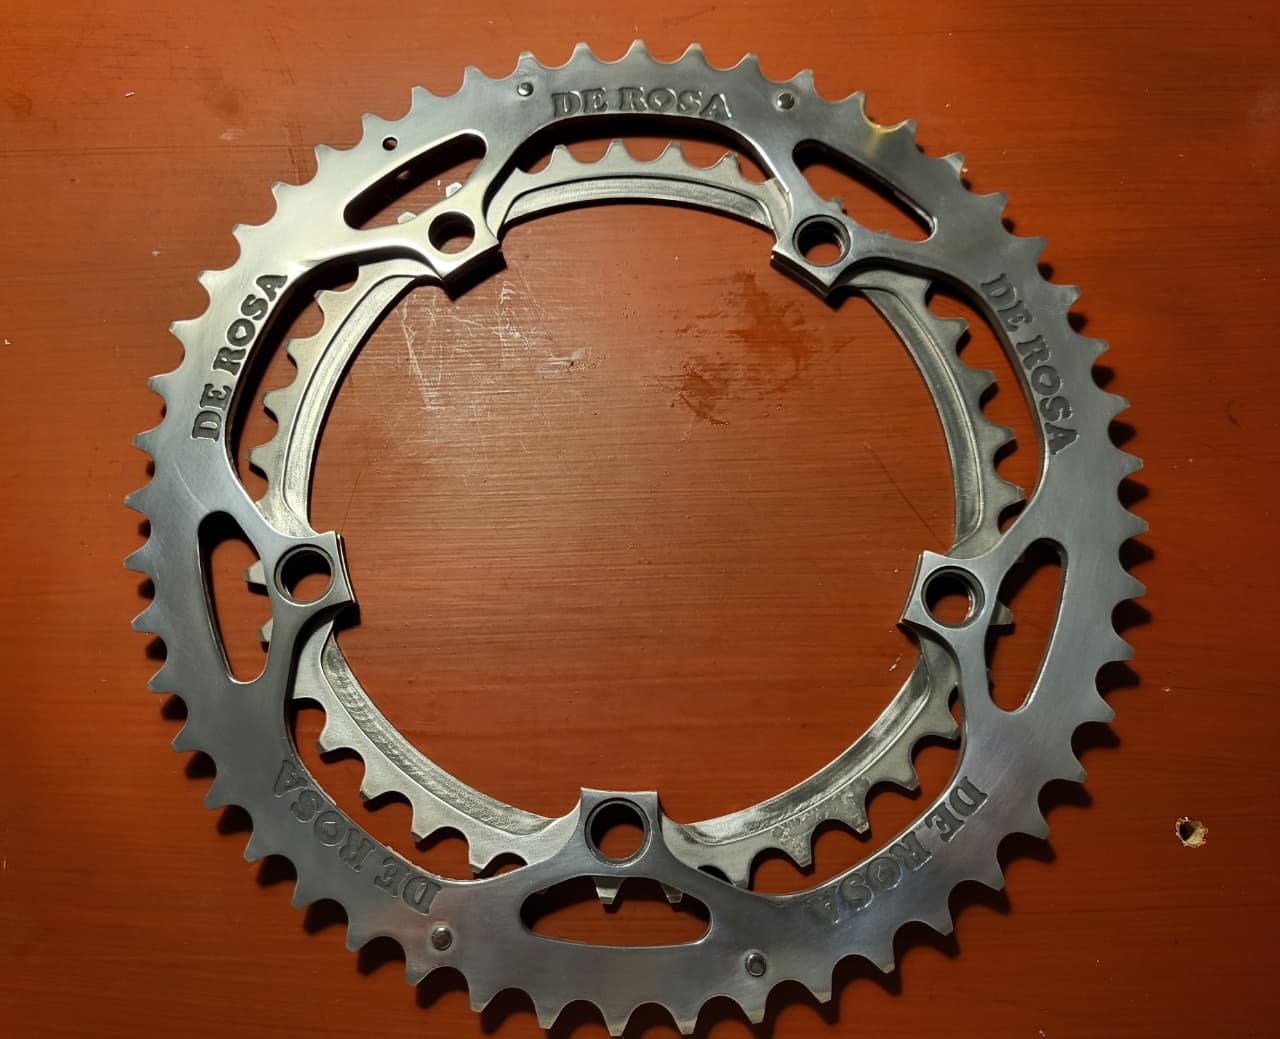
YES This can be done!!
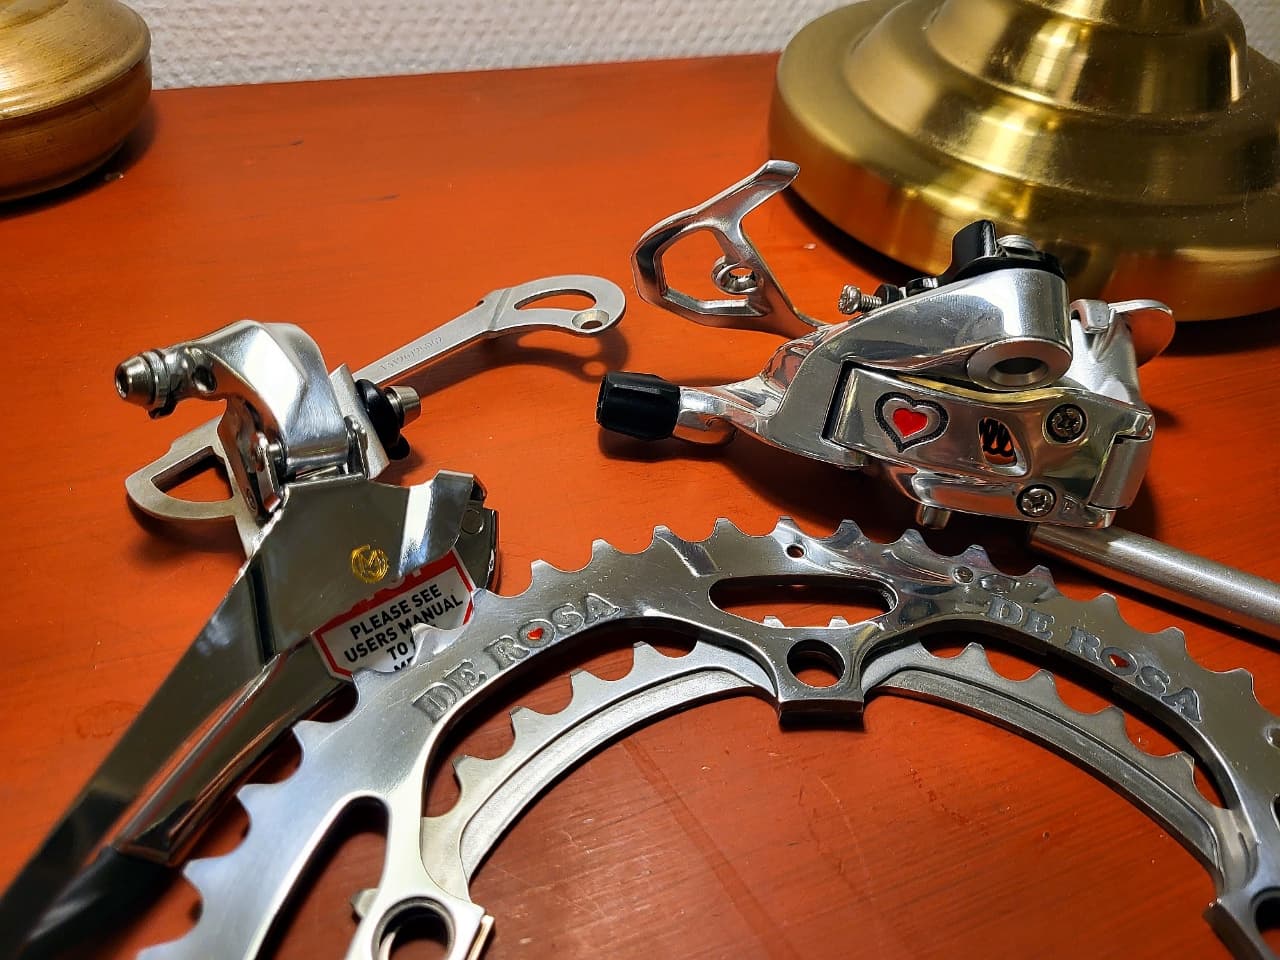
Finished with Red acryl paint to be enlighten the iconic of great italian bike brand.
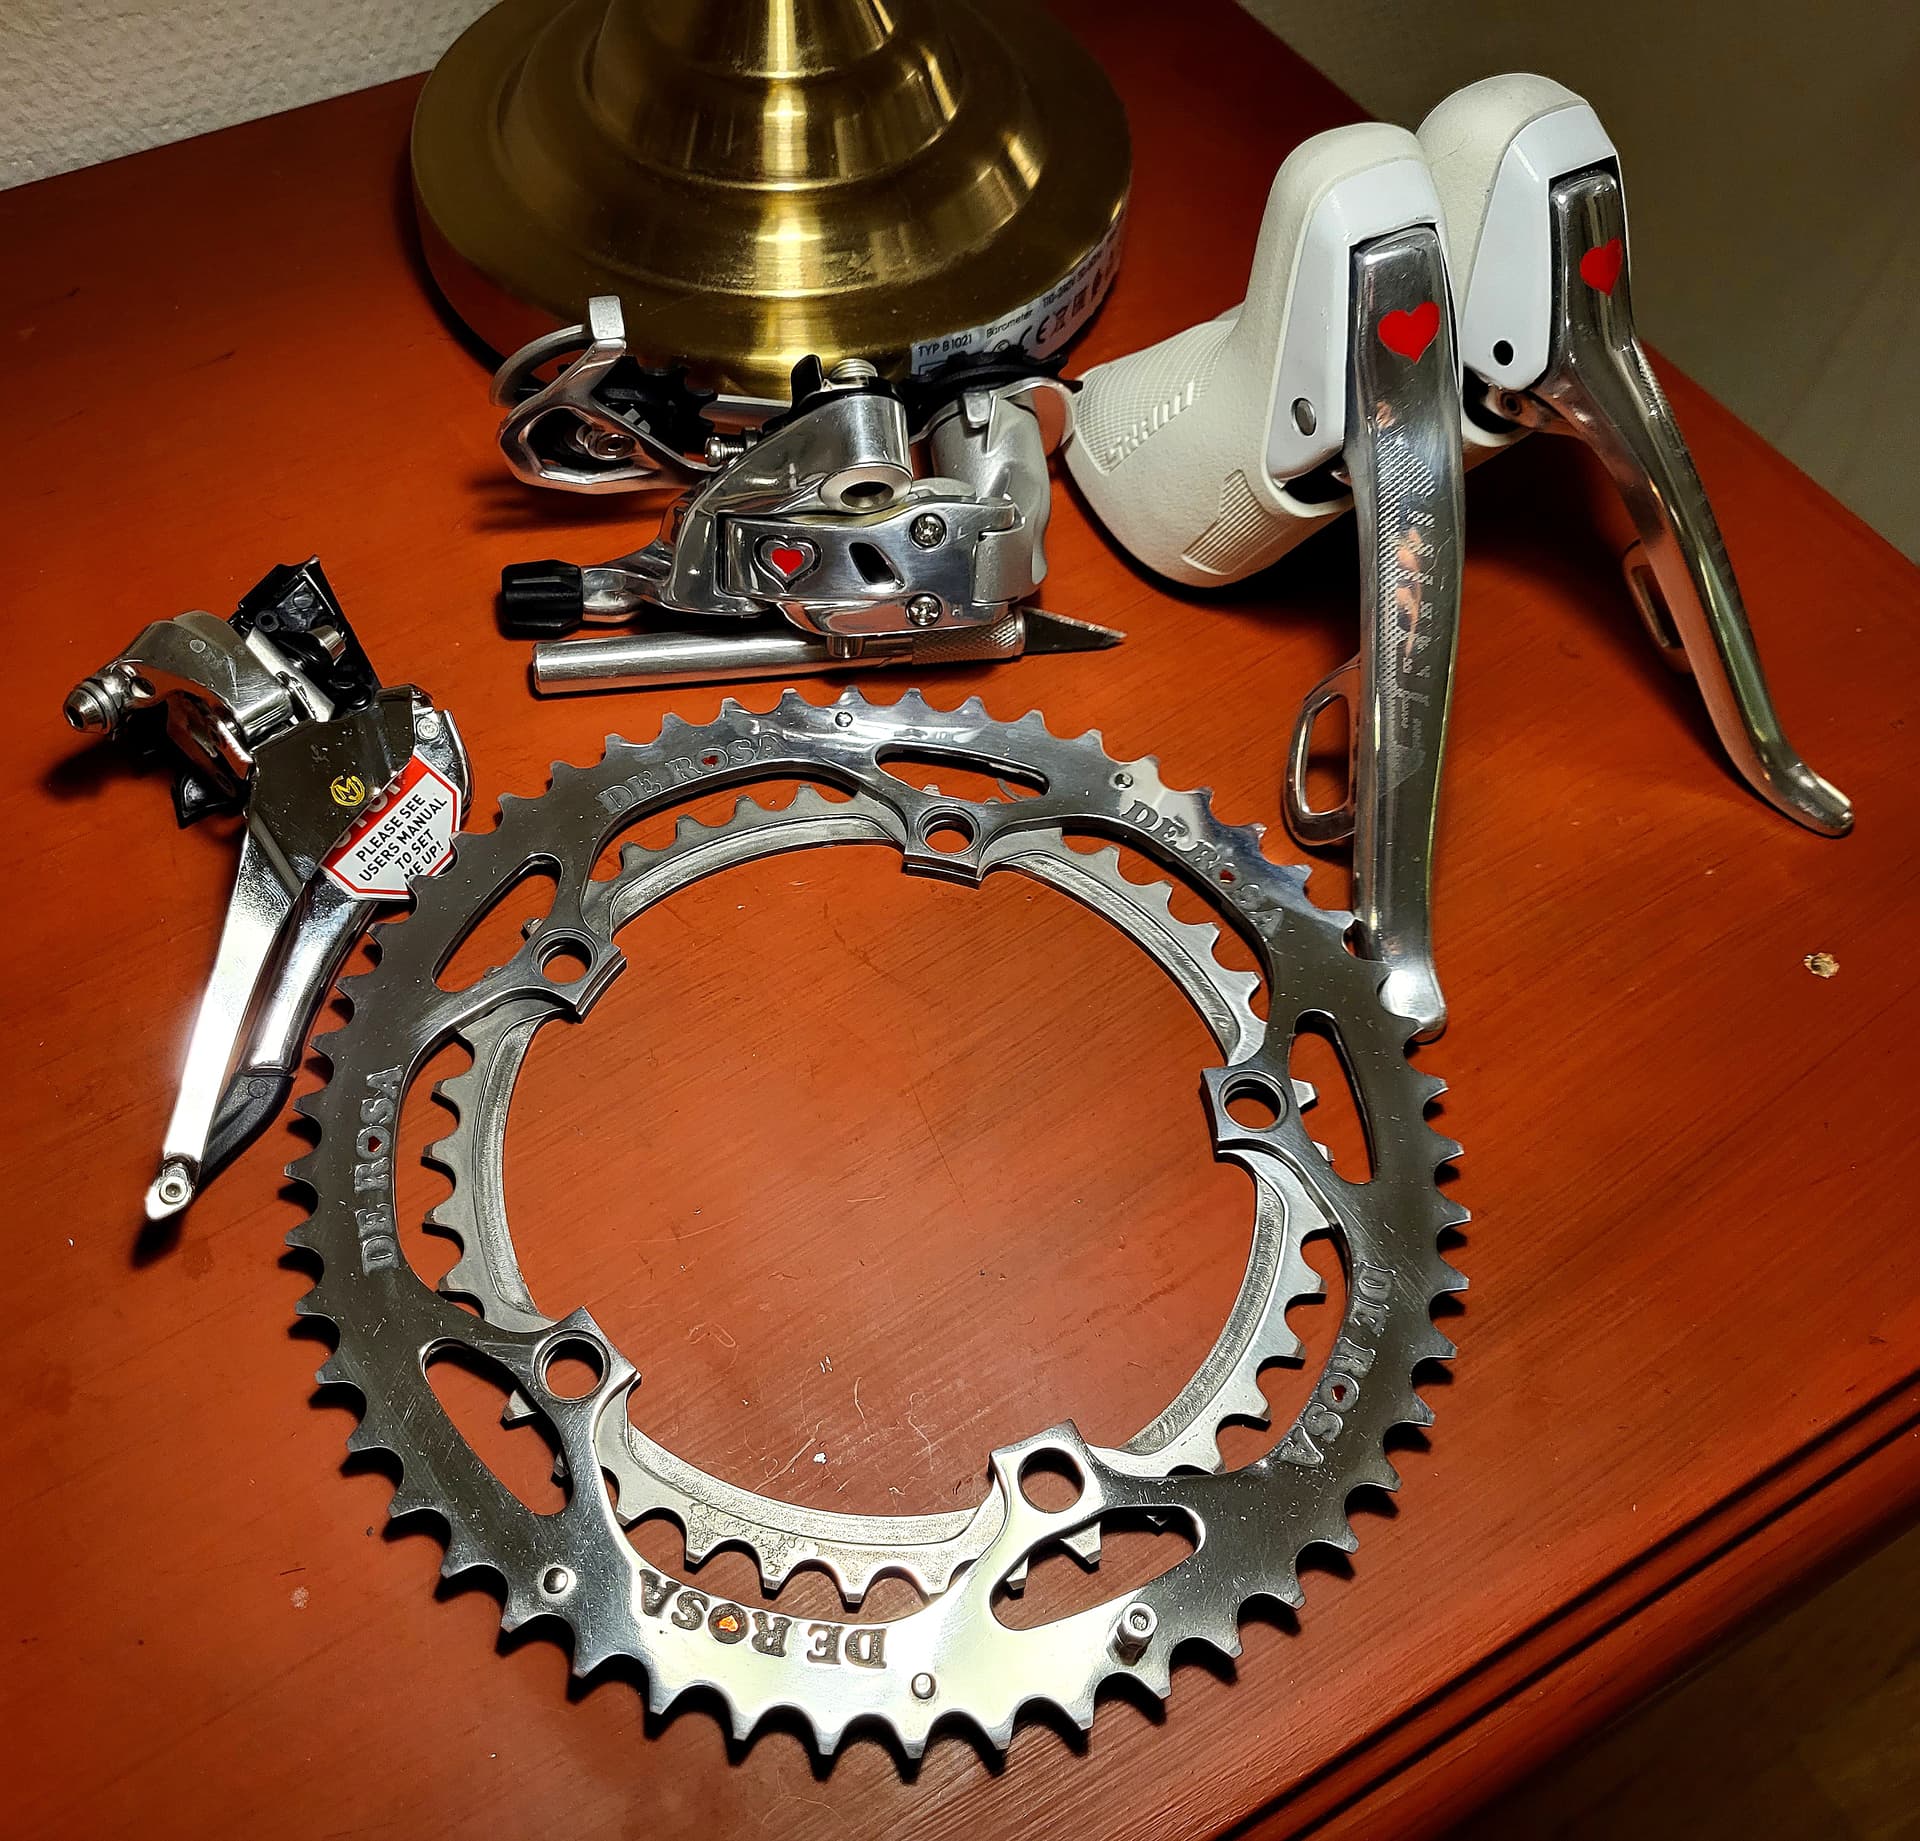
The whole project is dedicate to my old Derosa primato frame once again.
(which you could find the frameset from market place lol)
My De rosa has 1x 12 speed customized sram drivetrain but the chunky 1X RD and small chainring was not perfectly match for the figure of a Neo Retro preferance of mine.
But as the Ratiotechnology launched the 2x12 pulley for Sram 11s groupset in early this year, I decided to invest for new 2x11 groupset and decided to do customized and restore the bike once again with a bit more the taste of “Italian homage”.
Thank you for your reading and interest!